How to Measure a Replacement Drop Stitch Floor for an Inflatable Boat
Ordering a replacement drop stitch floor requires more than the overall length and width. The front taper, inflated thickness, holes, valve position and attachment details all affect how the floor fits inside your boat.
Whether you are replacing a damaged air deck or developing replacement floors for your own boat brand, a clear measurement drawing helps the manufacturer evaluate the design and identify missing information before production.
This guide explains what to measure, which photographs to provide and what to do if the original floor is no longer available.
Before You Start Measuring
First, identify what you are measuring:
- The original removable floor: Useful for recording its outline, thickness, holes, valve and attachments.
- The boat’s internal floor space: Useful for checking the available space and how the replacement floor will sit against the surrounding structure.
These measurements serve different purposes. The dimensions of the boat’s interior should not automatically become the finished dimensions of the replacement floor.
Record whether the boat and original floor are inflated or deflated during measurement. If inflated, note the pressure if known, following the original manufacturer’s instructions. Do not increase pressure simply to change the measured dimensions.
Prepare a tape measure, a straightedge and a simple sketch. Use one unit throughout the drawing—centimeters or millimeters—and clearly label the front, rear, top and bottom.
If the old floor is distorted, damaged or leaking, tell the manufacturer. Its current shape may not accurately represent its original dimensions.
Measure the Overall Length and Width
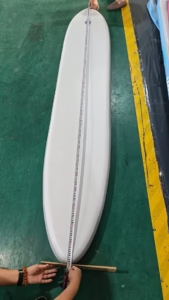
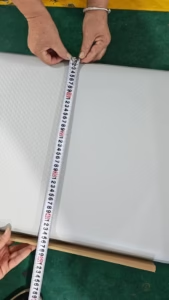
Measure the overall length along the floor’s centerline, from the rear edge to the front edge. Then measure the maximum width across the floor.
For a tapered or curved floor, these two measurements are only the starting point. Record additional widths at clearly marked positions along its length.
For example, you can mark several measurement stations on the centerline and record the width at each station. Identify the distance of each station from the same reference edge so the manufacturer can reproduce the outline.
Your drawing should show:
- Overall length.
- Maximum width.
- Width at the rear.
- Width at the front.
- Intermediate widths where the outline changes.
If the left and right sides differ, measure them separately. Do not assume the floor is symmetrical.
Record the Bow Shape and Taper
The front of an inflatable boat floor may be narrow, rounded, pointed or shaped around the boat’s internal structure.
To describe this area, record where the floor begins to narrow and the width at its front edge. State whether the narrowing section has straight sides or curved sides.
Always identify the reference point used for each dimension. For example, “115 cm from the rear edge to the beginning of the taper” is clearer than “taper length: 115 cm.”
For a complex outline, additional width measurements or a full-size template may be needed. Ask the manufacturer which format is most useful before sending a physical template.
A photograph helps explain the shape, but perspective can distort proportions. Use photographs together with measurements rather than as a substitute for them.
Measure the Floor Thickness
For a drop stitch floor, thickness means the distance between the upper and lower surfaces when inflated under the specified conditions.
This is different from the thickness of the coated fabric itself.
For example, a request for a 5 cm thick floor describes the inflated panel height. It does not describe the material coating thickness.
If the original floor is available, record its thickness and measurement condition. Also provide photographs showing how it fits beneath or alongside the boat’s tubes, seats and other components.
Do not assume a thicker replacement will fit or perform better in the existing boat. A change in thickness can affect installation, available space and the relationship between the floor and surrounding components.
The replacement floor’s working pressure should also be confirmed for its approved construction rather than copied from an unrelated product.
Mark Holes and Valve Positions
Holes and valves need their own dimensions. Showing their approximate locations in a photograph is not enough.
Hole Dimensions
For each circular hole, provide:
- Hole diameter.
- Distance from the hole center to the front or rear reference edge.
- Position relative to the floor centerline.
- Purpose of the hole, if known.
For a non-circular opening, provide its length, width, shape and position.
A distance to the hole center is not the hole diameter. For example, “15 cm from the front edge to the hole center” tells the manufacturer where the hole is located, but not how large it should be.
If the hole is centered across the floor, label it “on centerline.” If it is offset, state the direction and distance.
Valve Position
Show the valve’s center position on the drawing and identify whether it is on the top surface, side or another location.
Include a close-up photograph of the existing valve, along with its brand or model if available. Explain whether the replacement must work with an existing pump or adapter.
Also photograph the surrounding area so the manufacturer can check for possible interference with seats, tubes or accessories.
Photograph the Edges and Attachments
The floor’s perimeter and attachment details can be as important as its main dimensions.
Provide clear photographs of:
- The complete top and bottom surfaces.
- The front and rear edges.
- Side edges and reinforced areas.
- Handles, D-rings, straps or other attachments.
- The floor installed inside the boat.
- Any areas where the original floor curls, shifts or fits poorly.
Identify which features should remain and which should be removed.
For example, write “remove all D-rings and rear attachments” rather than leaving the manufacturer to interpret an older photograph.
If the original floor has an anti-slip surface or EVA pad, explain whether you want the same finish. Surface coverage and accessory positions should be shown on the drawing where relevant.
What If the Original Floor Is Missing?
A custom inflatable boat floor may still be evaluated without the original part, but more information will be needed.
Start by providing:
- Boat brand, model and approximate year, if known.
- Overall boat dimensions for identification.
- Measurements of the internal floor space.
- Interior photographs taken from above and from both ends.
- Details of seats, supports, attachments and other obstructions.
- Any original manual, floor drawing or reference photograph.
The boat’s advertised overall length is not enough to determine replacement-floor dimensions. Boats with similar external dimensions can have different internal layouts.
If you are upgrading from a different floor type, explain that clearly. Replacing an existing removable drop stitch floor and changing a boat to a new floor system require different evaluations.
For an unverified design, discuss a sample and fit check with the manufacturer before confirming bulk production.
Replacement Floor Measurement Checklist
Use the following checklist before requesting a quotation.
| Item | Information to Provide |
|---|---|
| Application | Boat, dinghy, kayak or another watercraft |
| Project type | Replacement, upgrade or OEM production |
| Measurement condition | Inflated or deflated; pressure if known |
| Overall dimensions | Length and maximum width |
| Outline | Front and rear widths, taper position and intermediate widths |
| Inflated thickness | Existing thickness or requested thickness |
| Holes | Diameter or opening dimensions, center position and purpose |
| Valve | Position, photographs and compatibility requirements |
| Attachments | Features to retain, remove or add |
| Surface | Existing finish and requested anti-slip treatment |
| Material | Existing material if known, preference and use conditions |
| Reference files | Drawing, photographs, template or original sample |
| Order details | Quantity and delivery destination |
If a measurement is unavailable, mark it as “to be confirmed.” This makes the missing information visible before the design is approved.
Request a Custom Replacement Drop Stitch Floor
XSEA Tech supplies custom drop stitch floors for inflatable boats, kayaks and dinghies.
To start an evaluation, send us your measurement sketch, photographs, required quantity and delivery destination. Please identify any changes you want to make to the original floor, including its outline, holes, valve, surface or attachments.
We will review the information and discuss any details that need clarification before preparing a quotation.
For brands and distributors developing a replacement-floor range, explore our drop stitch floor manufacturing services to discuss model-specific specifications and OEM requirements.
Send Your Floor Measurements and Photos for a Quote